Make your own face gels with aloe vera, rose, and more. Find the best ingredients for oily, dry, or sensitive skin and glow naturally.
If you’ve ever opened a jar of store-bought face gel and wondered what all those unpronounceable ingredients were, you’re not alone. The beauty industry is overflowing with products that promise miracles but rarely explain what’s actually in them.
How to Make DIY Face Gels 101 for Your Skin Type
The truth is, making your own DIY face gel at home is easier than it sounds — and once you learn how, you can create a formula that’s 100% natural, customized for your skin, and free from harsh chemicals.
This isn’t just another skincare trend; it’s a quiet revolution. As more people turn to clean beauty and transparency, homemade face gels are becoming a staple in self-care routines.
Let’s explore how these gels work, why they’re loved, and how you can create one that’s just right for your unique skin type.
What Exactly Is a Face Gel?
A face gel is a water-based skincare product designed to nourish, calm, and moisturize your skin without the heaviness of a cream. Unlike thick moisturizers, gels absorb quickly, leaving your face feeling cool and refreshed instead of oily or sticky.
Most gels are made from a base (such as aloe vera or glycerin), combined with hydrating agents and natural extracts that deliver specific benefits. Because they’re lightweight, they work beautifully for every skin type — especially in humid or hot weather when heavy creams can feel suffocating.
Think of them as the middle ground between a serum and a moisturizer: powerful enough to hydrate, gentle sufficient to layer, and light enough to use daily.
Why Choose a DIY Face Gel?
When you make your own skincare products, you’re not just saving money — you’re reclaiming control. You decide what goes on your skin, which means fewer irritants and no unnecessary fillers.
Here are a few reasons DIY gels stand out:
1. Customization: You can tweak every ingredient to match your skin type and mood. Regardless of your skin type—oily, dry, or sensitive—the ideal combination is out there.
2. Freshness: Homemade gels are made in small batches, ensuring your skin gets fresh, active nutrients — not something that’s been sitting on a shelf for months.
3. Clean Beauty: You eliminate synthetic fragrances, parabens, silicones, and dyes that often do more harm than good.
4. Affordability: Natural ingredients like aloe vera, rose water, and essential oils cost a fraction of high-end products.
5. Therapeutic Value: The process itself can be relaxing. Mixing, blending, and watching your gel come together feels like crafting a self-care potion — one designed specifically for you.
Essential Ingredients for DIY Face Gels
Before you dive into recipes, it helps to understand the building blocks of any face gel. Think of these as your essential toolkit — once you know what each ingredient does, creating your own blends becomes effortless.
1. The Base (The Foundation of Your Gel)
Your base gives your gel its texture and hydration power. Some of the best natural bases include:
- Aloe Vera Gel: The most popular choice — it cools, soothes, and hydrates while calming inflammation.
- Glycerin Gel: A humectant that pulls moisture from the air into your skin, making it ideal for dry or dull complexions.
- Natural Gums (Xanthan or Guar): Used to thicken and stabilize your mixture while keeping it silky and smooth.
2. The Hydrators (For Deep Moisture)
These add that dewy, plump feel without greasiness:
- Rose Water: Tones and balances.
- Cucumber Juice: Cools and calms sensitive skin.
- Hyaluronic Acid: Like a magnet, it draws and holds moisture.
3. The Actives (The Power Players)
This is where you personalize your gel’s benefits:
- For acne: Tea tree oil, witch hazel, or green tea extract.
- For dry skin: Honey, vitamin E, or rosehip oil.
- For sensitivity: Chamomile or calendula extract.
- For aging: Vitamin C, niacinamide, or green tea.
4. Optional Enhancers (Scent & Texture)
If you enjoy a sensory touch, add a drop or two of lavender or rose essential oil. Avoid synthetic fragrances; they can irritate even the toughest skin.
How to Match Your Gel to Your Skin Type
Your skin is unique — so your gel should be, too. Here’s how to create the perfect match.
Oily or Acne-Prone Skin
If your face feels greasy by midday or you struggle with breakouts, your skin needs a gel that hydrates without clogging pores. Aloe vera is your best friend.
Why it works:
Aloe vera regulates oil, cools irritation, and helps heal acne scars. Adding tea tree oil or witch hazel amplifies its antibacterial and astringent properties.
DIY Formula Example:
- 2 tbsp pure aloe vera gel
- 1 tsp green tea extract (antioxidant)
- 2–3 drops of tea tree essential oil
- Mix and store in a clean jar. Refrigerate for freshness.
Use morning and evening after cleansing. The cool touch instantly refreshes skin while controlling shine.
Dry or Dehydrated Skin
Dry skin craves deep moisture and barrier protection. A glycerin or hyaluronic acid base will lock in hydration without heaviness.
Why it works:
These ingredients attract water and prevent transepidermal moisture loss. Adding honey or rosehip oil provides softness and nourishment.
DIY Formula Example:
- 1 tbsp glycerin gel
- 1 tbsp rose water
- ½ tsp honey
- 2 drops of vitamin E oil
- Stir until smooth.
This gel delivers a healthy, dewy glow — perfect for morning use under makeup or as a night hydrator.
Sensitive Skin
When your skin reacts easily to products or weather changes, gentleness is key. Stick with cooling, anti-inflammatory ingredients.
Why it works:
Aloe vera combined with cucumber juice and chamomile extract calms redness and rebuilds the skin’s natural shield.
DIY Formula Example:
- 2 tbsp aloe vera gel
- 1 tbsp cucumber juice (strained)
- 1 tsp chamomile extract
- 1 drop calendula oil
Keep it in the fridge for a soothing, post-sun or post-cleanse treatment.
Combination Skin
You need balance—hydration without too much oil—if you have dry patches and oily areas on your skin.
Why it works:
A mix of aloe and glycerin creates the ideal hybrid base. Lavender oil and niacinamide can help even out tone and texture.
DIY Formula Example:
- 1 tbsp aloe vera gel
- 1 tbsp glycerin gel
- 1 tsp rose water
- 2 drops lavender oil
- ½ tsp niacinamide (optional)
This gel keeps dry areas soft while preventing oil buildup on the T-zone.
Mature or Aging Skin
With age, the skin’s natural collagen and hydration levels drop. Hyaluronic acid gel combined with antioxidant-rich oils helps restore elasticity and radiance.
Why it works:
Hyaluronic acid provides deep hydration, while rosehip and vitamin C promote collagen production and diminish fine lines.
DIY Formula Example:
- 2 tbsp hyaluronic acid gel
- 1 tsp rosehip oil
- ½ tsp vitamin C powder (dissolved)
- 1 drop geranium essential oil
Use daily at night for firm, glowing skin that feels plump and refreshed by morning.

How to Prepare Your DIY Face Gel (Step-by-Step Guide)
Now that you know your ingredients, here’s how to bring everything together.
Sanitize your workspace
Wipe down all surfaces, spoons, and jars with rubbing alcohol to keep your gel bacteria-free.
Choose your base
Start with 2–3 tablespoons of aloe vera, glycerin, or hyaluronic gel.
Add your liquids
Mix in rose water, cucumber juice, or herbal tea. Stir gently until the texture feels even.
Blend in your activities
Add oils, extracts, or essential oils — just a few drops go a long way.
Adjust texture
Suppose it’s too thick, thin it with more rose water. If it’s too runny, add a pinch of xanthan gum.
Store properly
Pour your gel into a clean, airtight glass jar. Keep it refrigerated — most homemade gels last up to two weeks.
5 Special DIY Face Gel Recipes to Try
Once you’ve learned how to make a basic hydrating face gel, you can start experimenting with custom blends that target specific skincare needs. Below are a few simple, natural recipes that serve as easy starters — no harsh chemicals, no complicated tools.
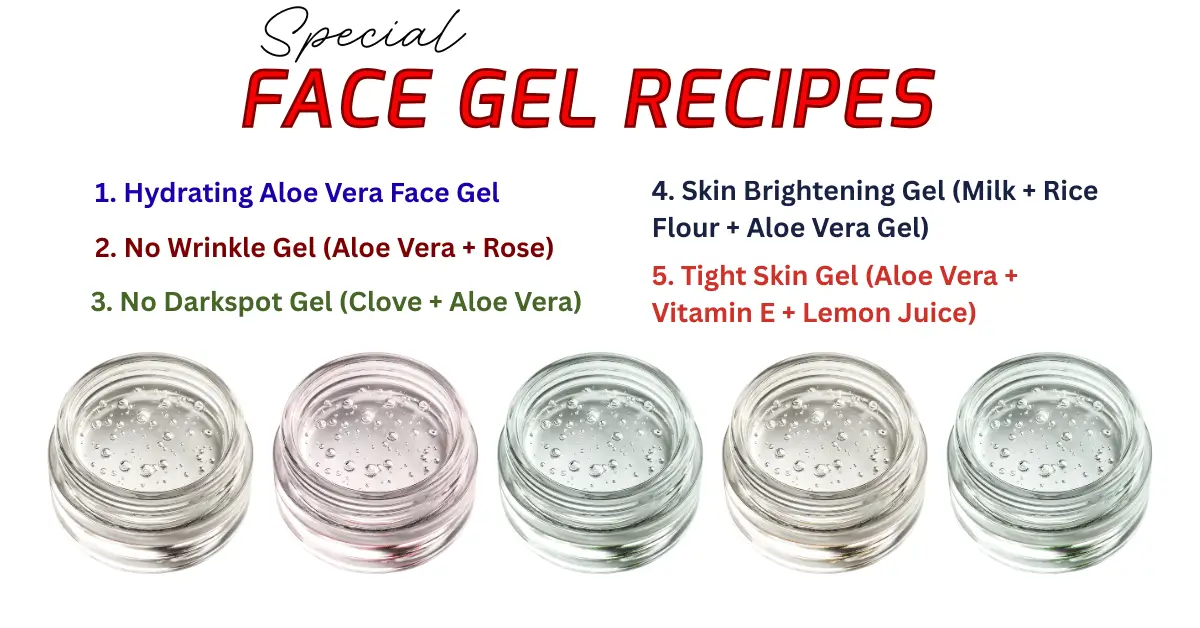
1. Hydrating Aloe Vera Face Gel (For All Skin Types)
Ingredients:
- 2 tablespoons pure aloe vera gel
- 1 teaspoon rose water
- 1 drop lavender essential oil (optional for fragrance)
How to Make:
Mix all ingredients in a clean bowl using a small spatula. Stir until the texture becomes smooth and even. For up to two weeks, keep it refrigerated in a clean glass jar.
How/When to Apply (Best for: All Skin Types)
After cleaning and toning the skin, apply a thin layer. Use it morning and evening as a light face gel moisturizer or primer under makeup. For a refreshing face gel mask, apply a thicker layer and leave it on for 15 minutes, then rinse with cool water.
2. No Wrinkle Gel (Aloe Vera + Rose)
Ingredients:
- 2 tablespoons aloe vera gel
- 1 tablespoon rose water or rose extract
- 2 drops rose essential oil or rosehip oil
- 1 capsule of vitamin E (optional)
How to Make:
Mix aloe vera gel with rose water in a pot. Mix in the vitamin E and essential oil until smooth. Store in a cold location after transferring to an airtight jar.
How/When to Apply (Best for: Mature or Dry Skin)
Use daily at night after cleansing and toning. Gently massage a small amount over your face and neck using upward strokes. It hydrates deeply and helps soften fine lines over time. For an extra treat, chill before applying — it feels like a mini spa moment.
3. No Darkspot Gel (Clove + Aloe Vera)
Ingredients:
- 2 tablespoons aloe vera gel
- 1–2 cloves (crushed into powder or steeped in warm water for extract)
- ½ teaspoon honey (optional, for moisture balance)
How to Make:
If using clove extract, steep crushed cloves in hot water for 5 minutes, then strain and cool. Mix this clove water with aloe vera gel and honey. Stir well until blended.
How/When to Apply (Best for: Oily or Acne-Prone Skin)
Apply a bit to clean skin, paying particular attention to dark patches or uneven skin tone. Use 3–4 times a week at night. Avoid the eye area. Over time, this natural brightening gel can help fade marks while calming breakouts.
4. Skin Brightening Gel (Milk + Rice Flour + Aloe Vera Gel)
Ingredients:
- 1 tablespoon milk (preferably raw or unboiled)
- 1 teaspoon rice flour
- 2 tablespoons aloe vera gel
How to Make:
Mix rice flour and milk into a smooth paste in a pot. Add aloe vera gel and stir until it forms a creamy gel consistency. Keep refrigerated for freshness.
How/When to Apply (Best for: Dull or Uneven Skin)
Apply evenly over your face as a hydrating face gel mask. Leave it on for 15–20 minutes, then rinse with lukewarm water. Use 2–3 times a week. It helps brighten the skin naturally, leaving it soft and glowing.
5. Tight Skin Gel (Aloe Vera + Vitamin E + Lemon Juice)
Ingredients:
- 2 tablespoons aloe vera gel
- 1 teaspoon lemon juice (fresh)
- 1 capsule of vitamin E
How to Make:
Mix aloe vera gel with lemon juice. In the mixture, puncture the vitamin E pill and squeeze out the contents. Stir until smooth.
When and How to Use Face Gels
Best for: Normal to Mature Skin
Use a thin layer on your face and neck at night. Leave it overnight and rinse in the morning. Use 2–3 times weekly. The vitamin E and lemon combo helps tighten pores and tone skin, while the aloe vera keeps it hydrated and soothed.
Avoid applying right before sun exposure due to the lemon’s photosensitivity.
Quick Tip:
Depending on how much you use and how long you keep it on, each of these gels can function as a cooling mask, a lightweight moisturizer, or a hydrating face gel. Patch-test new ingredients first, especially citrus-based formulations or essential oils.
Face gels fit seamlessly into almost any skincare routine.
- Morning: Apply after toner and before sunscreen or moisturizer.
- Night: Use as the last step before bed to lock in moisture.
- As a mask: Apply a thick layer for 15 minutes, then rinse off for an instant cooling boost.
Always start with a patch test on your wrist or jawline. Depending on your sensitivities, even natural components may produce problems.
Troubleshooting & Common Mistakes
Your gel feels sticky?
You might’ve added too much glycerin or honey. Dilute with a bit of rose water or aloe vera.
Does it smell odd after a few days?
It’s probably expired — homemade gels don’t contain preservatives. Make smaller batches.
Breakouts?
Check your essential oil ratio. A drop or two per batch is enough.
Texture separating?
Blend longer or use a small hand whisk for a smooth, unified consistency.
Extra Tips for Long-Lasting Results
- When scooping out your gel, always use clean fingers or a spatula; never dip twice into the same container.
- Store it in a cool, dark place or refrigerator.
- A drop of vitamin E oil, which functions as a natural preservative, can be added to prolong shelf life.
- If you love experimenting, try small test batches first to see how your skin reacts.
The Science of Simplicity
What makes DIY gels so effective is their close match to your skin’s natural chemistry. Ingredients like aloe vera, cucumber, and rose water have molecules small enough to penetrate the epidermis quickly, hydrating from within rather than sitting on top like heavy creams.
Store-bought products often rely on silicones and synthetic polymers to fake that “smooth” feeling. Natural gels provide genuine nourishment that your skin will appreciate over time.
Your Skin, Your Formula
The beauty of making your own face gel is that no two jars have to be the same. One week, you might need extra hydration; another, you might crave oil control or a cooling boost after sun exposure. Once you master the basics, creating your ideal formula becomes second nature.
Experiment with textures, scents, and actives — but always keep your skin’s feedback front and center. If your skin looks calm, hydrated, and balanced, you’ve found your sweet spot.
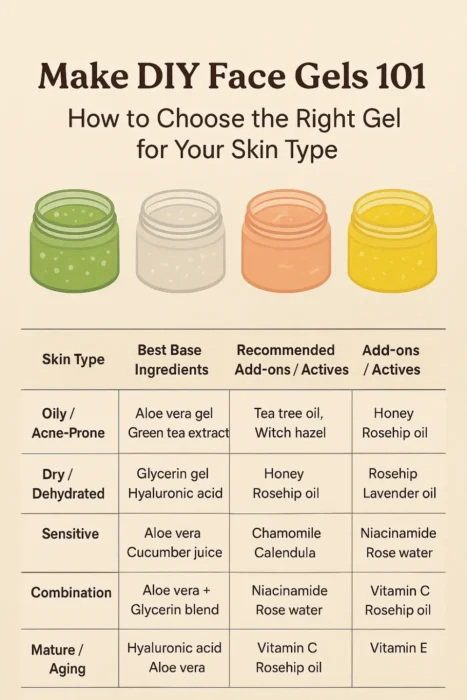
Quick Guide: Best DIY Face Gels by Skin Type
| Skin Type | Best Base Ingredients | Recommended Add-ons / Actives | Ideal Gel Type | Main Benefits |
|---|---|---|---|---|
| Oily / Acne-Prone | Aloe vera gel, green tea extract | Tea tree oil, witch hazel, niacinamide | No Darkspot Gel (Clove + Aloe Vera) | Controls oil, clears acne, reduces dark spots |
| Dry / Dehydrated | Glycerin gel, hyaluronic acid, rose water | Honey, rosehip oil, vitamin E | No Wrinkle Gel (Aloe Vera + Rose) | Deep hydration, smooth texture, nourished feel |
| Sensitive | Aloe vera + cucumber juice | Chamomile, calendula, lavender oil | Aloe Vera Face Gel (basic) | Soothes redness, calms irritation, refreshes skin |
| Combination | Aloe vera + glycerin blend | Niacinamide, rose water, green tea | Skin Brightening Gel (Milk + Rice Flour + Aloe Vera) | Balances T-zone, hydrates dry spots, adds glow |
| Mature / Aging | Hyaluronic acid gel, aloe vera | Vitamin C, rosehip oil, vitamin E | Tight Skin Gel (Aloe Vera + Vitamin E + Lemon Juice) | It firms skin, brightens tone, and reduces fine lines |
FAQs
Q. How to use aloe vera gel on the face at night
While you sleep, your skin repairs and regenerates when you apply aloe vera gel to your face. After cleansing, apply a thin, even layer to your face and neck, gently massaging it in. Leave it overnight to let the natural enzymes and vitamins absorb deeply.
By morning, your skin feels smoother, more hydrated, and refreshed. It also helps calm irritation, fade scars, and naturally balance oil levels. For extra cooling, use refrigerated aloe vera gel.
Q. Can I use shower gel on my face?
It’s best not to use shower gel on your face, even if it feels convenient. Shower gels are formulated for the thicker skin on your body and often contain more potent cleansing agents, which can strip facial skin of essential oils.
Your face has more delicate and sensitive skin that needs a pH-balanced cleanser. Regular use of shower gel can cause dryness, irritation, and even breakouts. Always choose a gentle facial cleanser suited to your skin type instead.
Q. What is the use of face gel?
A face gel is a lightweight, water-based skincare product that hydrates and soothes the skin without leaving any greasy residue. It absorbs quickly, making it ideal for hot or humid climates and for people who dislike heavy creams.
Face gels deliver moisture, calm inflammation, and refresh the skin instantly. They also make excellent bases for makeup or cooling masks after sun exposure. In short, they keep your skin balanced, hydrated, and glowing all day long.
Q. Can we use face gel daily?
Yes, you can absolutely use face gel daily — in fact, it’s designed for everyday hydration. Because gels are lightweight and non-comedogenic, they suit all skin types, even oily and sensitive ones.
Morning application preps your skin for the day, while nighttime use helps it repair and retain moisture. Consistent use can improve texture, reduce oil buildup, and maintain elasticity. Just choose a formula that matches your skin’s needs for the best results.
Q. Which is better, face cream or face gel?
Whether a face cream or face gel is better depends on your skin type. Face creams are richer and best for dry or mature skin that needs intense nourishment. Face gels, on the other hand, are lighter, fast-absorbing, and perfect for oily, acne-prone, or combination skin.
In warmer weather, gels feel more refreshing, while creams are ideal for colder months. Some people even use both — a gel by day and a cream at night — for balanced skincare.
Q. Does my face gel remove dark spots?
A face gel can help reduce dark spots if it contains the right brightening ingredients, such as aloe vera, vitamin C, clove, or niacinamide. These natural actives work gradually to even out skin tone and fade hyperpigmentation.
Consistent use, along with good sun protection, enhances results. While gels won’t erase spots overnight, they improve skin clarity and smoothness over time. For stubborn marks, pair your gel with regular exfoliation and a balanced skincare routine.
Final Thoughts
DIY face gels aren’t about perfection — they’re about connection. You’re connecting with your skin, learning what it needs, and creating something with your own hands to nourish it. That’s more than skincare; it’s self-care at its most mindful.
So grab a bowl, pick your favorite natural ingredients, and start experimenting. With a bit of patience and creativity, you’ll soon have your own signature gel — a refreshing blend made by you, for you.
Because the best skincare doesn’t come in a fancy jar — it comes from knowing your skin and giving it exactly what it needs.
Get more Health and Beauty Tips.
You might like: